Monday, June 29, 2015

repaired headlamp and glove box cowl

Making repairs on more parts.  On the glove box cowl there was a fair amount of rust in the bottom edge.  Pretty common as water pools in this location.  So I cleaned it up and applied some rust sealant.  Here are a few photos;  one after cleaning and knocking off the major rust and one after the rust sealant had cured for 24 hours.  On top of the rust sealant I sprayed a few coats of the Rustoleum clear.


Here is a photo of the repaired headlamp lens.  The reflector had been rusty and peeling.  I cleaned that up and hit it with a coat of Rustoleum mirror reflective silver.  Looks pretty darn good and will be ready for rebuild and a new bulb.


Sunday, June 28, 2015

Clear coats, Penetrol and other finishing ideas

As I get various parts cleaned and ready for reassembly I am trying to finish them up, move them to the side and then turn my attention to the next parts of the project.

To that end I spent some time this weekend playing around with  a few finishing ideas for the wheels, cowls and mudguard  Here are some pictures and end results.

If you read the blog entry when I was pulling the tires from the rims you will have seen this picture already.  The tires were shot but the rims looked they they could be saved.


Once the tires were removed the rims were soaked in Evapo-rust.  I think they came out looking pretty good.  There was some missing paint where the rust had eaten it away but lots of good paint remained.  I hit the cleaned up rims with a few coats of satin clear enamel to seal up the bare metal parts and protect what paint was remaining.  On the inside I worked the rust down to a manageable level and used a Dremel to sand down the surface of the rims so the tire and inner tubes will have smooth contact with the rim itself.  I then coated the inside of the rim with a permatex rust converter to help prevent future rust build up. The rims are ready to go on the shelf for now and wait for some new tires. 


As I finish cleaning various body parts I am finishing off the painted sides with several coats of Penetrol.  Penetrol has the viscosity to penetrate the single stage paint helping to refresh its color and integrity while also providing a good shine as can be seen below.  I have heard some complain that Penetrol remains tacky but I have never had that experience.  I live in Colorado where the climate is high and dry and this product hardens up just fine for a nice protective finish.


Interesting paint discoloration photos

So I was cruising the web looking for info and ideas on my rebuild and came upon this site where another guy in Italy was working to restore a VL1T.  It seems his project or at least his blog stalled out.  But in the mean time he posted some pictures I found very interesting.

Here is the address of the blog:

http://et3.it/topic/40029-restauro-struzzo-vl1t/

And here is one of the photos I found very curious:


This scooter is nearly identical to mine in age and condition.  Red primer inside the tank area, wheels and rims in the same shape.  And look at that discoloration!  Ivory to Grey.  Exactly the same as on my scoot.  I began to wonder is this simply an oxidation of old paint?

I looked very very closely at my scoot.  While some parts may have some oxidation effect othes are clearly repainted.  But the color similarities are very weird.  Anyway...

Front mudguard and more paint musings. An accident?

So I took off the lower bearing race and then slipped the mudguard up off the fork.  As I began to inspect and clean the mudguard more light was shed on the original/not original paint issue.  A secret was also revealed from the scooter's past.  It is like reading mystery novel and clues keep being shared until the story is fully told.

So here is the photo.  So you can get an orientation this is inside the front mudguard looking up at the hole on the top of the mudguard where the fork would come through.

The first thing you can see is a large bare metal circle surrounding the fork hole.  This is where I soaked the piece in a pool of evapo-rust and it cleaned up the rust and the primer down to bare metal.  I did this because I wanted to see clearly what was underneath.

Looking at the 11:00 o'clock position on the hole you can see a small golden triangle sitting inside a grey semi-circle.  This is a braze.  The metal had been "riped" or torn apart in this location and it would appear someone brazed it back together with some brass.  On the outside the damage is barely noticeable so some body work and repaint was done to cover the repair.  It is a pretty good job and not major damage by any stretch of the imagination.  This repair is on the front side of the fork hole opening.  SO in order for this damage to occur the mudguard had to have been shoved back against the fork hard enough to have caused the sheet metal to tear.


Photo #2 reinforces the theory.  On the front edge of the mudguard is another small repair.  You can see below where material was added to bring the mudguard back close to original shape.  It is not perfect and takes very close inspection to detect.  On the outside it is not noticeable unless you have seen the inside.  This is in fact damage from an accident.


A final piece of the puzzle (no picture included) is that the rear non engine side cowl was "stuck" on the frame.  When I say stuck I mean that it did not want to give way and be removed.  As I worked the cowl off the frame I realized the reason it was so resistant was because the 5 or 6 long screws which extend from the frame and through the brackets on the cowl were all bent forward wedging the cowl in place so it did not want to be pulled free.  Not just one of the screws but all of them.  After going back to reinspect them I found they were all bent and nearly the same angle.  So at some point in time the frame came to a sudden stop and that cowl jolted forward bending all of the attachment screws.  I believe that happened in the same crash which caused the from mudguard damage.

Conclusion and thoughts:  OK so we have a front on crash.  That crash had to accomplish 2 things.

1) The front mudguard had to have been impacted (not just the front wheel) damaging the front edge of the mudguard and forcing it back on to the fork and splitting the mudguard against the fork.

2) The front wheel and fork had to have come to a sudden stop causing the frame to stop quickly enough that the left rear cowl jolted forward bending it's attachment screws.

So it was a pretty decent crash and it explains some of the body work and repainting like you see below.  The mudguard, along with part of the legshield and one of the cowls, went from original Ivory (Avorio) to Grey (Grigio)


This also begins to explain why the front fork was removed and, as noted in a previous post, replaced but with no bearings.

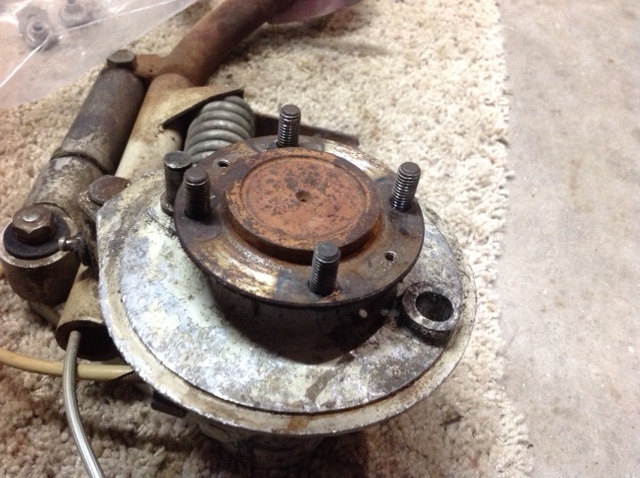
The mudguard was never removed.  I do not think the person doing the repair and repaint was able to figure out how to remove the lower bearing race to get the mudguard off.  SO the mudguard was repaired and repainted on the fork (this is reinforced by some grey over spray on the shock spring)

The scooter was never ridden again after this accident and she began to sit and gather rust.  The repaint and rebuild was never completed either due to lack of time, energy or parts.

Was the fork damaged and is it still usable?  That is a very real question which will need to be addressed as time goes on.

Was the engine taken out at this time?  I suspect it was and maybe transplanted to another scooter or left sitting on a shelf.

I am thinking more clues will show themselves as the clean up and tear down continues.

Removal front brakes and hub

Continuing to tear down the scoot, evaluate what I have on my hands and clean things up for an eventual rebuild.  Made a fair amount of progress on some small projects this week so I will make a couple of posts to bring things up to date.

Here we have a few photos of the front hub and brakes as they came off of the fork.  The hub spins freely and feels smooth.  I will pull it apart soon to get a look at the internals but I am hoping it will be mostly in very solid condition.  Some rust removal to take place here to bring the paint back to the forefront.


The hub itself is good.  Again some rust removal to take place.


And here is a picture of the original brake shoes with the original Piaggio logo.  These were very cool to see but sadly are beyond repair and service so they will not be going back on in the rebuild.  This kind of brake set-up has one pivot pin and both shoes fit over the one pin rather than the more common two pin set up where each shoe has its own pin.  Removal was a bit tricky not to mention that they were pretty stuck on the pivot pin with corrosion.


Wednesday, June 24, 2015

Headlight

Took the headlight apart today for cleaning and rebuild prep.

Here is what I found.  The headlight glass is beautiful.  Original SIEM logo with Torino above the logo.  Very nice.


Reflector is messed up as to be expected.  I think I can clean this up and repaint with bight reflective silver paint.


Rim is original and very cool.  Older version with SIEM spelled out in square lettering not with the entire logo stamped on like newer rims.


Have started work on cleaning the front fork and learned some important things about the history of this scoot.  That will be my next post.


Monday, June 15, 2015

Rust removal on the rims

As documented in the last post the rust on the old rims was extensive.  I was hopeful there was still some good paint which would make the rims worth salvaging.

Well I had some Evaporust left over from the floorboard job and decided to dunk one of the rims in for a test.  I could only submerge half of the rim but here is a photo of the result.   The line where the Evaporust reached is pretty obvious.  There is an amazing amount of good paint still on the rims which should work fine when we get to rebuilding the wheels.  It is crazy how this product will remove the rust right off the paint and yet the paint is left in place and undamaged.  Very cool I think.


Sunday, June 14, 2015

Rust free left floorboard and tires!

Who wants to spend an afternoon separating rims from tires which have not been separated since they were originally assembled?  This job took hours.  But first let's start with a fun shot.  Here is the left floorboard after several treatments of Evaporust.  Rust free and solid metal!  I put some everyday wax over this area to keep new rust away for the time being while I determine a final course of action.  Here is a before and after shot of the same area on the left floorboard.


Now for some pictures of those wheels before I removed the rims from the tires:


And the inside with one half of the rim removed.  This rust was a bugger.  Soap, WD-40, pry bars, bouncing the rims on a concrete slab, jumping on the tire edges.  I used every trick in the book to get them off.  This photo shows one of the reasons why I think these tires and rims have been together for 60 years.  The corrosion build up is remarkable.


Here is a picture of two rims off one tire.  I believe this set is going to be salvageable and once the rust is removed may even have some decent paint.  The second set was worse off and may not make it through the process of cleaning...we shall see...the pitting looked pretty bad from the rust.


This photo shows a stronger reason why I think the tires and even the tubes are original.  Both were labeled Michelin fabricated in Italia Torino.  Turin was the first production plant for Michelin outside of France and still operates today.  These tires and tubes came from Turin most likely directly to the Piaggio factory in Pontedera just 4 hours to the south.  A real close look at this tube shows it did not quite fit in the tire.  The heavy creases near the valve stem show they have been pinched in that position for many years.  The tires were falling apart from dry rot but the tubes were still holding air when I pulled them from the tires.  Crazy.


I have some work to do on the rims.  Some scrubbing, some rust removal, maybe some sanding and some painting.  We will see how that story unfolds.  Glad to have the rims free.


Saturday, June 13, 2015

Headset removal

I have been dying to get inside the headset ever since I brought this girl home and this week I finally gave in to the temptation.  Opened her up and found some real great stuff.

Original headlight glass and rim.  The pictures are rough as all I had was a bad cell phone camera.  You can see the SIEM logo on the glass (which needs to be cleaned up).  On the headlight rim is just the word "SIEM" in plain letters which is common on the old rims.  The newer rims all have the complete logo stamped on the the headlight rims.


The reflector is shot and needs to be replaced.  The original (or at least a very old bulb) was still in the socket.  Check out the asymmetrical shape of what almost feels like a piece of hand blown glass.   Sadly the bulb is shot and not worth much.  The socket is in excellent shape and very usable.


Here is a photo of the inside of the headlamp cavity (very clean) and then the entire headset with handlebar.  I love this stuff.  It is like opening up a time capsule.


Floorboard rust removal

As stated I was going to use Evaporust to pull the rust off the worst parts.  Started that process this week focusing on the left floorboard where the frame rust was worst.


I have taken the rubber out of the floor rails and am working to soften that up before putting it back in place.  One rubber was too tight to remove without pulling the rivets which I did not want to do so you can see it still in place.

There are holes in the floorboard for the center stand so I plugged those up with dental wax like the kids use on their braces.  I then filled the entire floorboard with about 3 quarts of Evaporust.  The paper towels are acting to keep some of the Evaporust on spots where the pool of product did not quite reach.  

The preliminary results have been very good and these photos are actually of round 2.  Once the process is complete I will post a before and after picture.   The paint in this area is very weak and a fair amount of it will come off as I continue to clean and then prep for whatever coating will eventually go down.

The frame is solid with no pinholes or rust weakness.  If at some time in the future of this scooter's life someone wanted to blast and repaint the entire bike the frame is a very good candidate for that process.

Paint findings and musings

Worked a bit more on cleaning some of the off frame parts.  Started to work a bit on the front mudguard.  This piece was pretty clean so did not require a lot of work.  Also started to work on the 2 cowls.  The paint mystery continues.  The front mudguard is fully painted the "newer grey" color but the front swing arm and hub are the original off white from the scooters of that time period.  The mudguard was painted while it was on the fork as the front spring has a bit of over spray on it.  I took off the front mudguard decorative piece and the original white color is still underneath.  I did not take any photos but it is clear the mudguard was repainted.  The rear engine side cowl is also the newer grey color but the opposite side cowl is the original white.

Yet the scooter frame is the original white with the exception of the front left hand side of the leg shield.   This paint work was done a  long time ago as the scratches and rust marks throughout the bike on original and new paint pieces are all very consistent in age and type.

The front mudguard decoration was taken off at some time in the past and was put back on incorrectly with the lock washers on the outer side between the frame and the decorative piece rather than being placed on the underside between the frame and the nut.  However this piece was not removed for the painting as it had very slight over spray on the edges and as I mentioned the paint underneath the piece was the original white.  At the time of the painting the piece had been masked off and then the piece was removed and replaced at some time after that painting event.

As mentioned previously the front fork had been completely removed once also and then put back in place, including the wiring, but without the proper bearings.  Very strange.

I can not for the life of me determine why someone would paint parts of this scooter (half leg shield, front mudguard and rear engine cowl) when there is no real damage to the body?  And why would you remove the front fork and put it back on without bearings?

The fork question I can maybe explain away as an error which, when discovered halted some past rebuild process but the painting question stumps me.  If you are going to paint a mudguard and a cowl why not paint both cowls?  I mused that maybe they were from a different bike but then how does the left half of the leg shield get painted the grey?  I just don't get it.  Maybe as I continue forward this puzzle will give me another clue.

Of course I am a bit disappointed that the entire scoot is not original paint.  This finding has me leaning a bit more towards putting a modern engine in and not working too hard to rebuild a wide body motor.  That is all much further down the line.

Monday, June 1, 2015

Exterior Frame Cleaning

Had a very busy month of May as my son graduated High School and finalized his college decision.  Exciting times.  I hope to make the most of our moments together this summer before he heads off to the Pacific Northwest.  Also rebuilt my back deck and finished my Allstate engine rebuild in May.  So not a lot of focus on the VL1T.

This past weekend I started some cleaning on the frame.  It was not too bad.  Oftentimes the grease and dirt on the bottom and in the engine compartment is so thick it takes tons of work to get it loose.  On this girl there was certainly some of that but not as bad as I have seen.  Here are some pictures before I got started.


In the top picture you can see the left hand side floorboard has the worst rust areas.  I worked those pretty good and lost a fair amount of paint but still believe I will move forward retaining the original with some kind of clear coat idea.  The underside is in great condition and the grease and dirt started to let go after a few minutes of gentle work and soaking.  DAWN detergent and a sponge, nothing caustic or abrasive.

I also took her over to the car wash and let her soak there for a bit and used some careful pressure.  It will take one more try this weekend and I will post finished pictures.  Then on to the rust issue with Evapo-Rust.

One nice thing when you clean a scoot like this is you see every inch up close.  Interestingly the front of the leg shield was exposed to some kind of paint on the left hand side.  The original paint is still on the right hand side and also in places on the left but there is a shade of grey on the left which I will try to see if I can lift off.  The line between the two colors under the horn cast is very distinct almost like it was masked off or was sitting in a corner where a box or tarp covered part of the leg shield and left part exposed while another object was being painted.  If you look at the photo at the top of the page you can see the color variation clearly around where the "VESPA" plate should be.  Oddly the horncast is 100% the correct original color  almost like it was not on the scoot when the grey color was introduced?  Another odd mystery from somewhere in the past 60 years.

On another note the cobbler has finished work on the saddle and I will probably pick that up tomorrow and post some photos.  I hope I am happy.